
HF/vhf/uhf/shf MULTI-MODE REPEATER/remote base
SASKWARN - Sharing the Craft of Repeater and Remote Base Building
Motorola CDM Radios make great low power multimode repeaters for low-profile "neighborhood repeaters" and exciters feeding outboard power amplifiers for higher power systems. I prefer the low power versions of the radios.
This webpage was developed to cover their implementation as a UHF Repeater with the added bonus of additional remote base capabilities using a minipc to control those remote bases using various software packages.
Being able to access the system with low latency anywhere on your personal home network or abroad using a VPN that generates webpages for control and monitoring is a dream come true.
The CDM radios need to be programmed to be able to accept 9600 baud digital signals. Other 9600 baud capable radios can be used.
This project has a number of different elements:
+ programming radios
+ programming PISTAR
+ programming ALLSTAR
+ programming IRLP
+ programming repeater controller (if used)
+ building cables
+ setting up mini pc (optional)
+ setting up KVM IP (optional)
+ setting up VPN (optional)
+ duplexor tuning
+ feedline and antenna installation
+ more not listed
Adding a secure VPN and remote control using KVM (keyboard, video, mouse) solutions is also covered if a minipc master control computer is implemented.
There are a number of ways that this can be done.
We will illustrate a method we employed that simplified the process with off the shelf components.
Why build a Multi-Mode Repeater?
Join our community of radio enthusiasts and start building your multi-mode repeater with expert guidance.
A repeater that does both analog and digital modes enables the users the opportunity to try different modes without having to have different repeaters for each mode.
This "futureproofs" the system as it takes advantage of existing modalities yet leaves room for future developments.
Cabling Requirements - (Under Construction)
MUX-25 Board DB-25 to Motorola CDM Radio Connector Cable
MUX-25 Board DB-9 Analog Interface to Arcom RC-210 Repeater Controller
MUX-25 Board DB-25 to Motorola CDM Radio Connector Cable

The MUX - 25 Board was originally built for the proper pinout for the Kenwood TKR-750/850 Repeaters.
We need to build a cable from the DB-25 of the MUX-25 to a DB-9 to the radios..
One can purchase a premade cable that directly connects between the STM32DVM (DB-9) to the Motorola CDM radios flat multi-pin connector.
Another cable would then need to be made to connect from that DB-9 connector to the DB-25 connector on the MUX-25 Board.
Notes: From Kevin Kuster and Scott Zimmerman
Pin 4 on the Digital DB9 on the MUX-25 goes to an isolated pad on the circuit board. An insulated wire could be tacked onto the solder side of the circuit board and routed to the DB25 -—to one of its unused pins to gain continuity between the "repeater" and the STM32DVM if necessary. I generally use #30 "Kynar" (wire wrap) wire for this type of circuit board augmentation and super glue to hold it in place along its path. The RSSI has nothing to do with the ability of the MMDVM’s ability to decode. Its ONLY function is to add telemetry to the Dashboard on incoming signal strength. Since digital is a go/no-go situation, the RSSI is the only way you can determine how well someone is accessing the repeater. The MMDVM will work just fine without the RSSI being connected, you just won't be able to tell how well someone is getting into the repeater.
MUX-25 Board DB-9 to STM32DVM Digital Interface
MUX-25 Board DB-9 Analog Interface to Arcom RC-210 Repeater Controller
MUX-25 Board DB-25 to Motorola CDM Radio Connector Cable
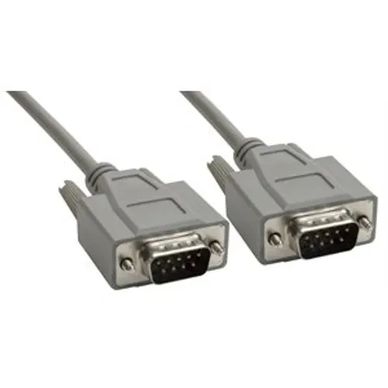
This cable is a DB-9 to DB-9 Cable. Pay close attention to the pinouts on each device.
The STM-32DVM comes with a Male DB-9 connector and a shield.
One would need to supply a shielded cable and another DB-9 Male Connector to fit on the digital side of the MUX-25 board.
MUX-25 Board DB-9 Analog Interface to Arcom RC-210 Repeater Controller
MUX-25 Board DB-9 Analog Interface to Arcom RC-210 Repeater Controller

This cable is also a DB-9 to DB-9 Cable. Pay close attention to the pinout on each device.
12 Volt Power to MUX-25 Board

J4 Connector is supplied with the board. You need to supply the power wires and the connector and pins will need to be attached.
13.8 Volt Power to STM32 DVM

Repeater Builder sells a 13.8 volt to 5 volt adapter to be able to power the Raspberry Pi3B SBC connected to the STM32DVM. It then gets the 13.8 volts power from the MUX-25 board.
ARCOM RC-210 Repeater Controller with Voip and links

The Repeater controller is powered off a 13.8 volt source and uses a Phoenix 4 Pin Connector to the repeater controller.

SASKWARN
Ready to explore the fascinating world of amateur radio and strengthen your community connections? Our website is a dedicated hub for enthusiasts passionate about communication technology, technical learning, and building resilient community networks across Saskatchewan and beyond. Discover a diverse selection of resources designed to expand your skills, support public service, and connect you with dedicated operators.